


From Frame to Finish: A Practical Guide to Joinery for DIY & Trade Customers
Published on February 19, 2026
Posted in Advice & Reviews
by MKM
6 min read
Joinery is one of those trades that people think they understand, until they actually try it. Whether it’s hanging an internal door, fitting wall panelling, installing a dado rail or finishing off a loft conversion with a roof window, good joinery is all about precision, preparation and product knowledge.
For trade professionals, joinery is a daily bread and butter skill that needs to be efficient, accurate and profitable. For DIYers, it’s often the difference between a home improvement project that looks professional and one that ends in frustration.
In this guide, we’ll walk through some of the most common interior joinery jobs, explaining best practice, materials, time considerations and common pitfalls, helping both DIY and trade customers get the best possible finish from start to finish.
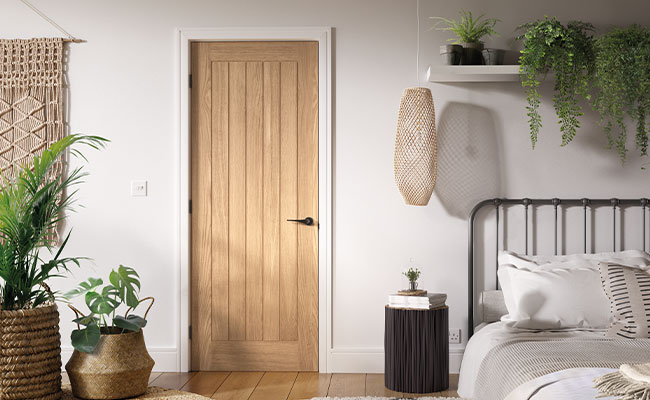
Internal Doors: Getting the Basics Right
Few joinery jobs look simply but punish mistakes quite like hanging an internal door. Get it right and it operates smoothly for years. Get it wrong and it’ll stick, squeak or swing open on its own.
Choosing the Right Door
Internal doors generally fall into two categories:
- Hollow core doors: Lightweight and affordable, ideal for DIYers on a budget or low-traffic areas.
- Solid or solid-core doors: Heavier, more robust and better for sound insulation. These are often preferred by trade customers for quality installs and higher-end homes.
When choosing doors, sizing is critical. Older UK properties often have frames that aren’t square or standard, so allow time for trimming. Always check:
- Frame width and height
- Floor level (especially with new flooring planned)
- Door swing direction and clearance
How Long Does It Take to Hang a Door?
This is one of the most common questions from both customers and clients.
- Trade professional: Around 45–90 minutes per door, depending on frame condition, ironmongery and whether trimming is required.
- DIYer: Allow half a day per door, especially if it’s your first time.
A typical trade workflow includes:
- Checking the frame for square and level
- Trimming the door (if needed)
- Marking and routing hinge recesses
- Hanging and adjusting
- Fitting handles and latches
Speed comes from preparation and sharp tools, rushing rarely saves time.
Quoting & Cost Considerations
For trade customers, accurate quoting is essential. Typical UK fitting costs vary depending on region, but prices usually account for:
- Labour
- Ironmongery
- Trimming and adjustments
- Disposal of old doors (if required)
DIY customers should budget not just for the door itself, but also hinges, handles, latches, fixings and finishing materials.
Common Door Hanging Mistakes
- Not checking floor levels before hanging
- Misaligned hinges causing binding
- Failing to allow for carpet or flooring thickness
- Over-trimming doors and exposing the core
Measure twice. Trim once.
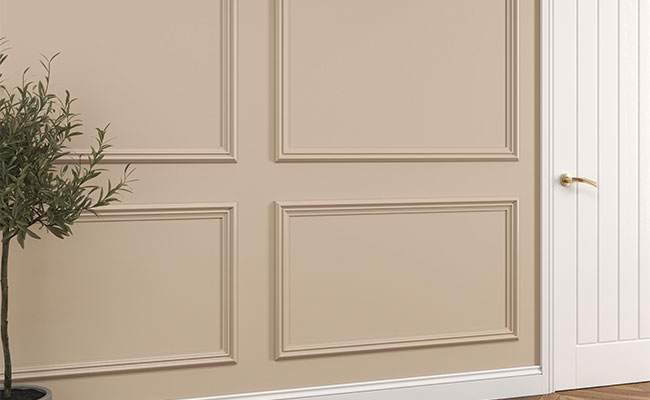
Wall Panelling: Adding Character and Value
Wall panelling has seen a huge resurgence in recent years, and it’s now just as popular in modern homes as it is in period properties.
Panelling Materials Explained
The most common materials include:
- MDF: Cost-effective, easy to work with and ideal for painted finishes. A favourite for both DIY and trade.
- Plywood: Strong and stable, often used where durability matters.
- Hardwood: Premium look and feel, but higher cost and longer install time.
For trade installers, MDF often offers the best balance of speed, finish and margin.
Installation Best Practice
A successful panelling job starts with good preparation:
- Ensure walls are flat and clean
- Mark out panel spacing carefully
- Use a laser level to maintain accuracy
Panels are typically fixed using grab adhesive and pin nails, then filled, sanded and painted. For DIYers, patience during the setting-out stage is key, uneven spacing will stand out immediately.
Challenges to Watch Out For
- Walls that aren’t plumb or straight
- Skirting boards that need adapting
- MDF expansion if not acclimatised properly
Allow materials to sit in the room for at least 48 hours before installation, especially in new builds or colder months.
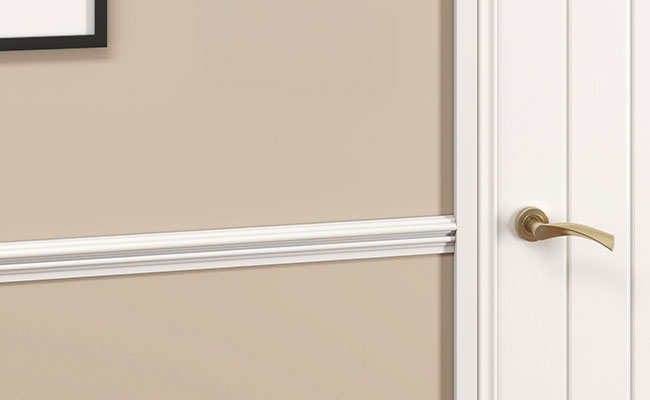
Dado Rails: Traditional Detail, Modern Appeal
Dado rails divide opinion but used correctly they can transform a space.
Why Use a Dado Rail?
Originally, dado rails protected walls from chair backs. Today, they’re mainly decorative, but they still:
- Add visual interest
- Break up large wall areas
- Work well with panelling and two-tone paint schemes
They’re especially popular in hallways, dining rooms and period renovations.
Installing a Dado Rail
The standard height is usually one third of the wall height, but modern designs are more flexible.
Key tips:
- Mark a continuous level line around the room
- Mitre internal and external corners carefully
- Use adhesive and pins for a secure fix
Trade installers benefit from speed here, once measured correctly, dado rails are quick and profitable jobs.
Are Dado Rails Outdated?
Short answer: no, but context matters.
They suit:
- Period properties
- Feature walls
- Homes with traditional detailing
In ultra-modern interiors, they’re best used sparingly or avoided altogether.
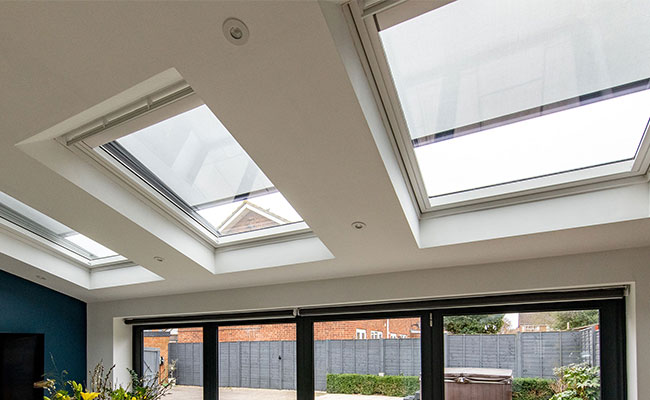
Velux Windows: Bringing Light into Living Spaces
Velux and roof windows often sit at the crossover between joinery, roofing and interior finishing, and they’re increasingly popular in UK homes.
What Joiners Need to Know
Common Velux window types include:
- Centre-pivot roof windows
- Top-hung windows for better views
- Conservation styles for listed buildings
Joiners are often responsible for internal finishing: trimming, reveals and plasterboard details.
Planning Permission & Practicalities
In most cases, Velux windows fall under permitted development, but permission may be required if:
- The property is listed
- It’s in a conservation area
- The window faces a highway
Scaffold access, roof pitch and weather conditions all affect timing and cost.
Cost and Installation Time
Typical UK costs vary depending on size and access, but a standard installation usually takes 1–2 days, including finishing work.
Compared to traditional skylights, Velux windows offer:
- Better insulation
- Integrated flashing systems
- Reliable warranties
Essential Tools & Materials for Joinery Jobs
Whether you’re trade or DIY, the right tools make all the difference.
Core Joinery Tools
- Circular saw or track saw
- Router with guides
- Sharp chisels and planes
- Drill/driver with quality bits
- Spirit levels and laser levels
Materials & Consumables
- Grab adhesives and wood glue
- Screws, fixings and shims
- Fillers, sealants and sandpaper
- Finishing products (primers, paints, oils)
Reliable materials save time, reduce call-backs and improve results.
Final Thoughts
Good joinery isn’t just about cutting wood, it’s about planning, precision and choosing the right products for the job.
For DIY customers, taking the time to prepare properly and investing in quality materials can mean the difference between a frustrating project and a professional-looking finish.
For trade professionals, efficiency, accurate quoting and dependable supplies are what keep jobs profitable and customers happy.
At MKM, we stock a wide range of timber, doors, fixings, tools and joinery, with knowledgeable branch teams who understand both the trade and DIY sides of every project. Whether you’re fitting one door or finishing an entire interior, having the right support makes all the difference. Shop online or at your local branch, with free local delivery.
Up Next
